

For the day 2 under Blogging 101, I will be talking about how to improve your photo colour and lighting after clicking your pictures.
All my pictures are shot indoors, most times during night time. Offlate when I am planning weekend cooking, I do take my pictures in the day time, still indoors only. I have a bay window that is now cleared up and acts as my studio. The Bay window has light coming from all three sides, it has a white blinds with a big plywood that acts as a bouncer for the entire setup.
I have used my Pakistani Garam masala for showcasing today's Blogging 101. These pictures were clicked around 1 pm.

I always shoot in Manual Mode, with the fixed ISO and focal ratio.
The picture is shot at ISO 800, f/5.0, 1/100. I normally never change this settings. The only thing I change is the shutter speed, depending on the light inflow.
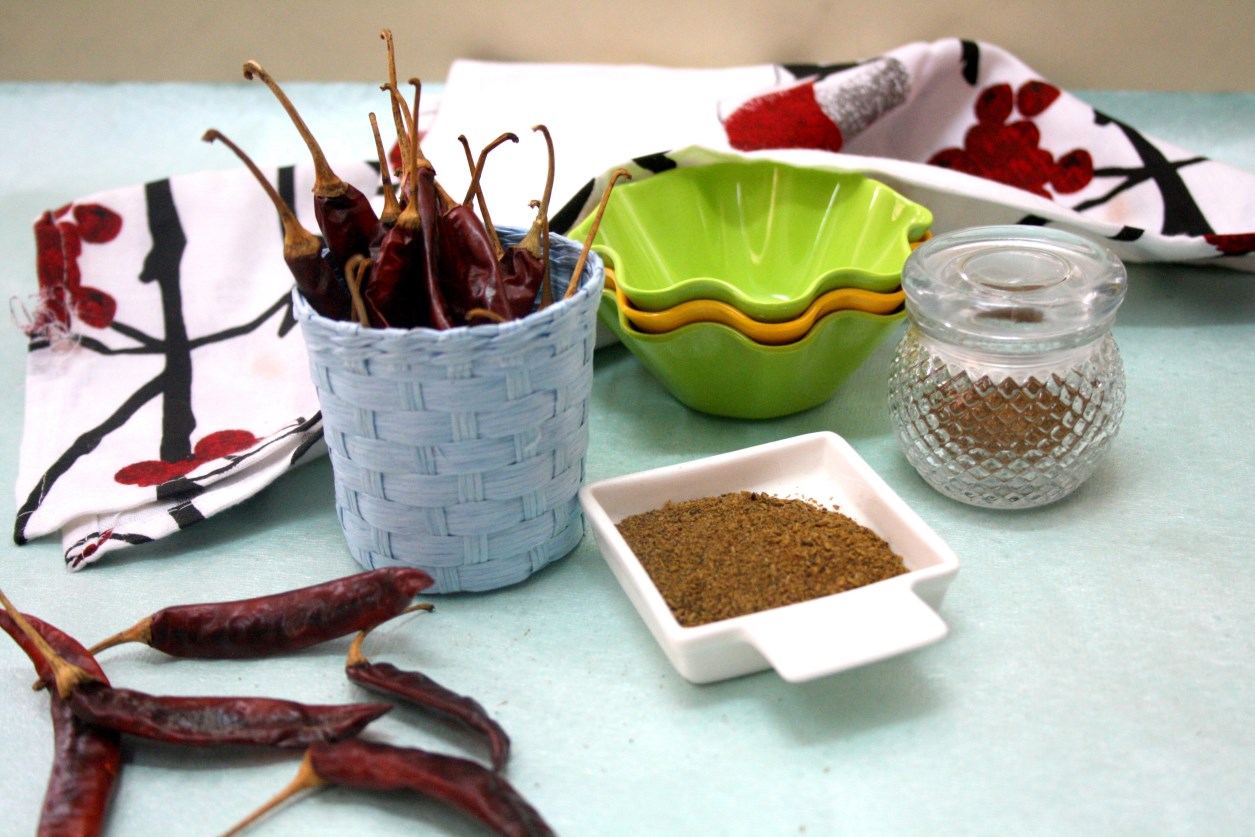
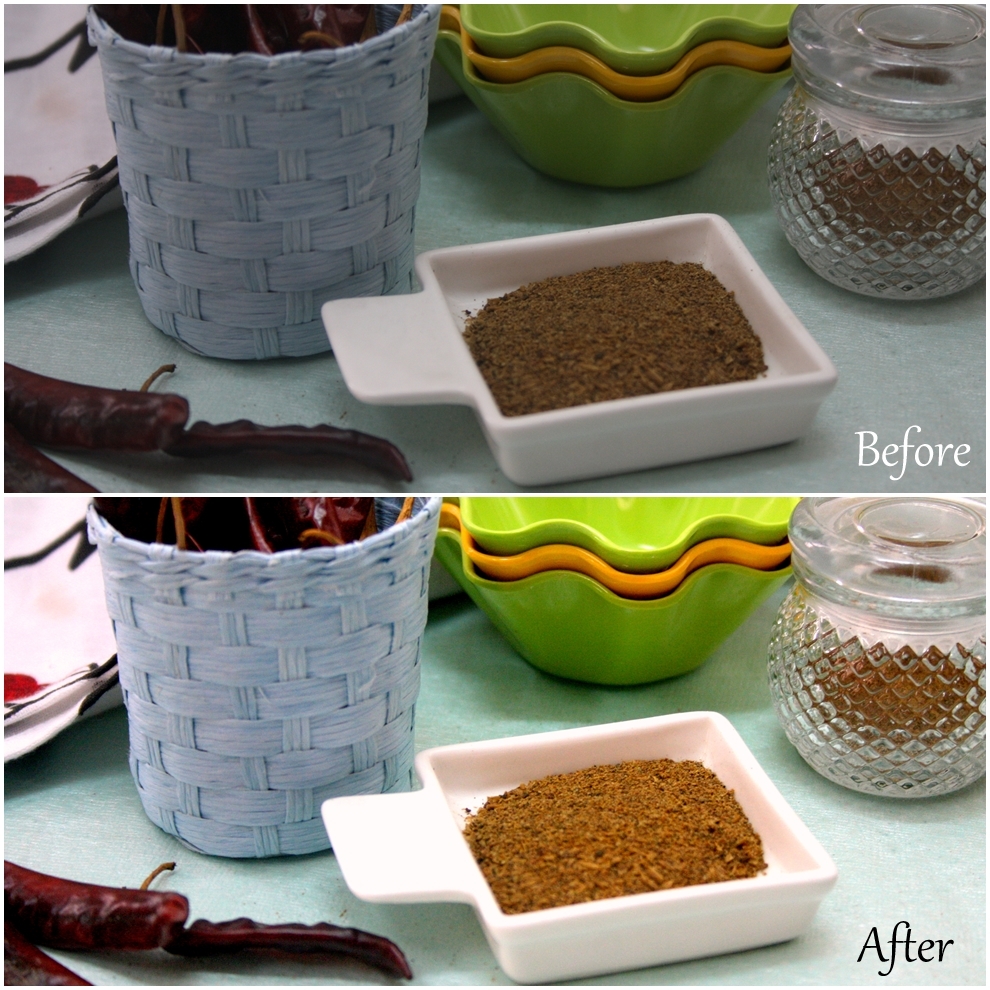
The above picture is an unmodified picture, downloaded and shared without any changes.
Observe how bright the picture looks. I had quite a bright day that day. However I didn't notice that the picture got dimmed when I took a closeup shoot of the small bowl.
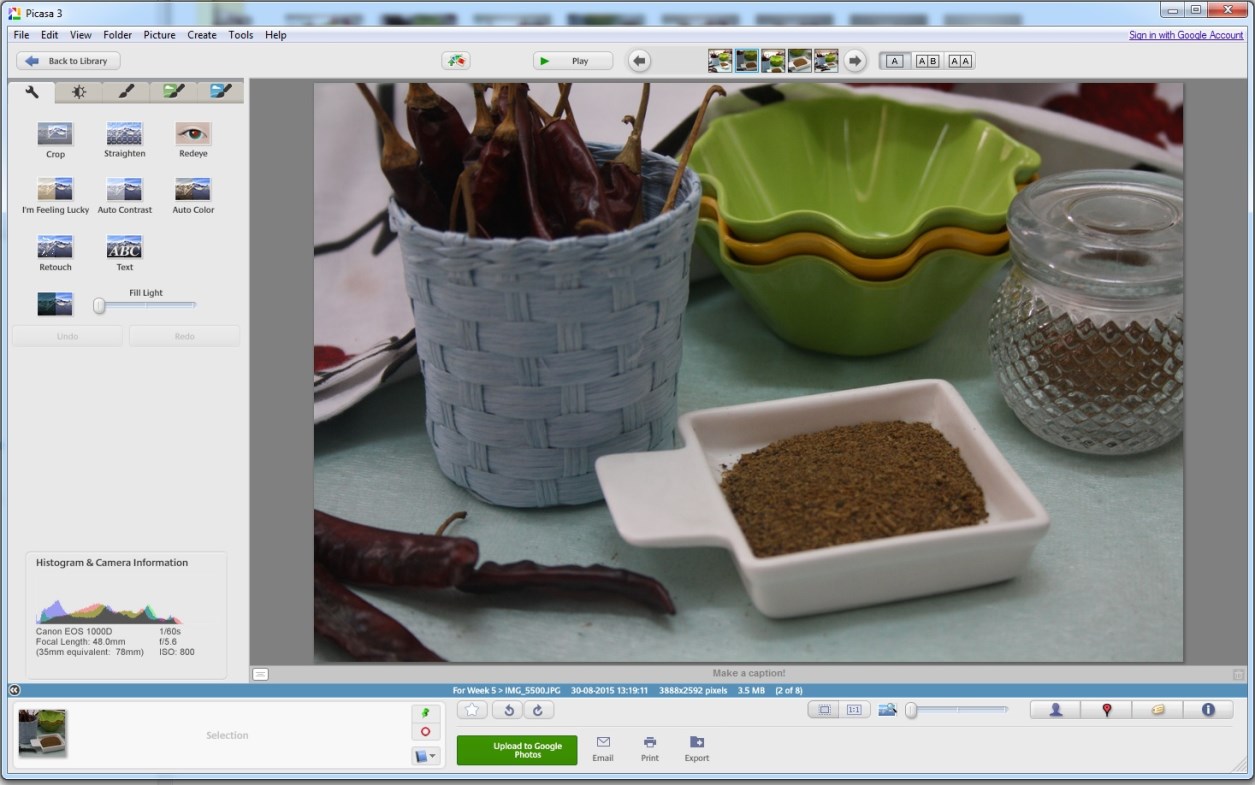
Refer the picture below. Remember both are clicked within seconds and both unmodified.

I do not have the luxury of transferring and checking on the pictures right away. When I downloaded these pictures after a day, I noticed that this closeup picture was dull.
So I use Picasa to do Fill Light and Hightlight.
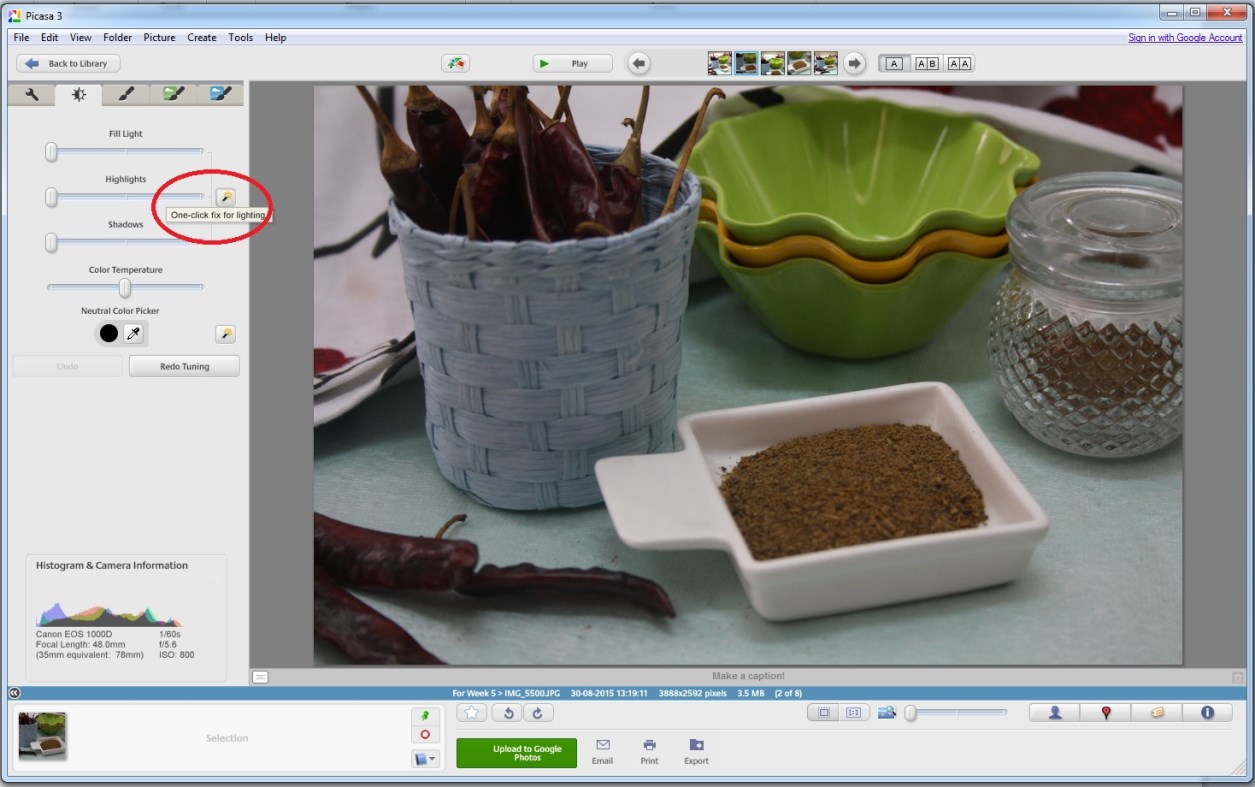
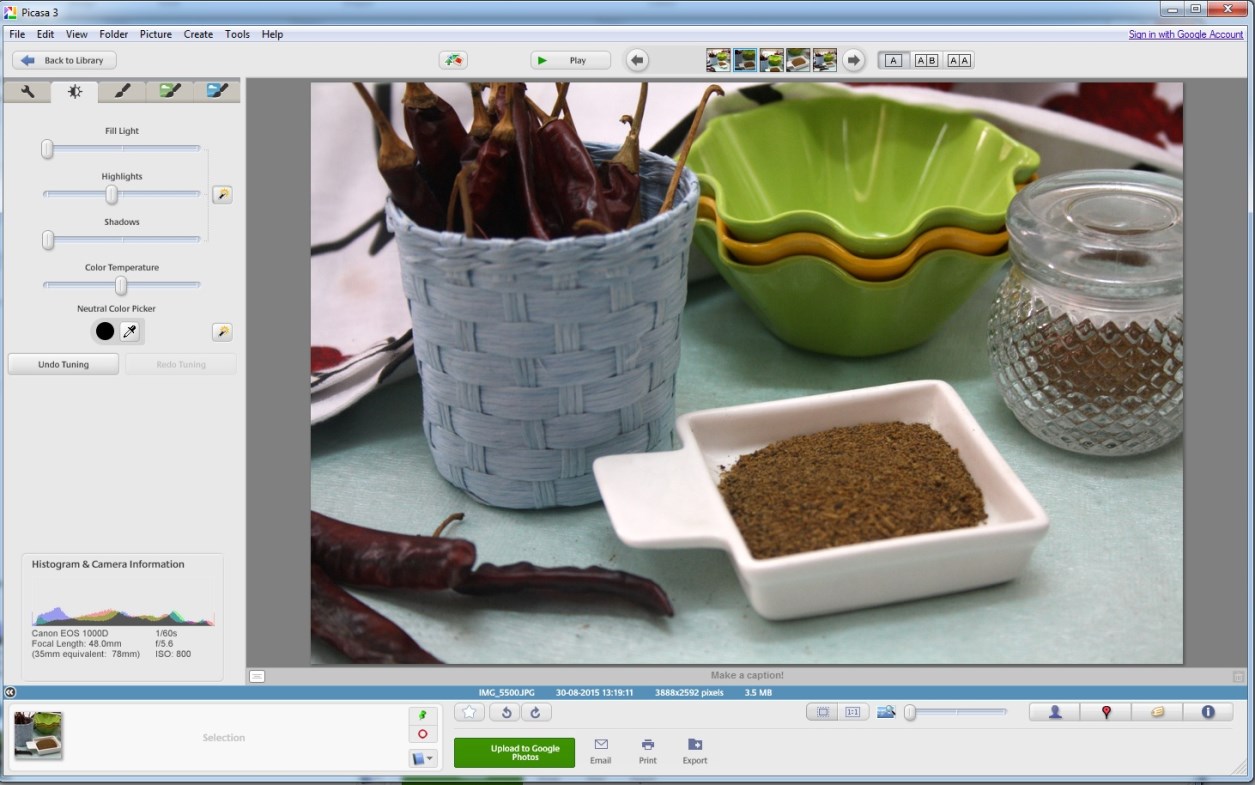
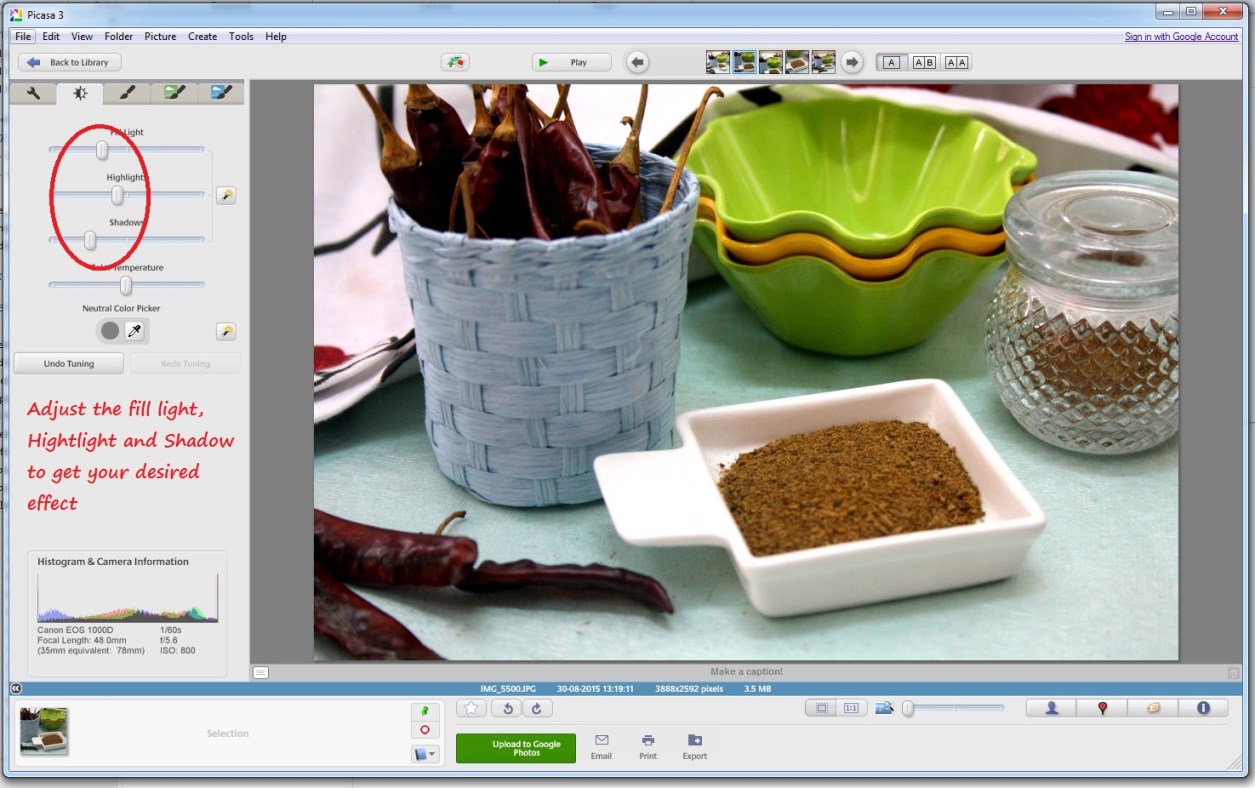
While other advanced tools gives us more options, I have felt I am much more comfortable using Picasa.
Do share if you have any other useful tool for this.

Check out the Blogging Marathon page for the other Blogging Marathoners doing BM# 56
Usha says
I usually shoot with 2 -3 different settings and most of the time the picture that looks perfect in camera looks either over exposed or underexposed. I shoot with 3 - 4 different shutter speeds and usually I get the right exposure in one of those 3-4 settings. If I am not happy, I fill light or add shadows.
When you took the close up shot, did you zoom in? When you zoom in, your aperture increasing, meaning you are letting in very little light. In which case you need to keep your shutter open for a long time, may be 1/80 or 1/60 s or even longer. If you did not change your shutter speed after zooming, that could be the reason why close up picture was dim.
vaishali sabnani says
I am no photography expert...but even I use picasa to fill in light if need arises..normally I click early mornings or early evenings when there is ample light so I generally do not require to fill in ,..but at times when I need to its picasa that I use.
Srividhya says
Thanks a lot Valli. I still have your email from last year for brightening. This is great. Bookmarking for sure
Nivedhanams Sowmya says
that is a great tip!!! should try to do this to fix my pics with this idea!!!
Sandhiya says
Great tip Valli, but what i felt is original color of the dish get changed when i use fill light option..whether i dont know how to use it or is there any way to avoid that?
Archana Potdar says
Heee! All my secrets will be out in the open Valli. I too need to get a place for my pics and most importantly time to set up.
Srivalli says
Sandhiya If we begin with shooting in a bright area, we normally won't have that problem. The filling is required only when, in-spite of the area being bright, we still need to do a slight touch up. Also you can play around increasing and decreasing the different options.
sneha datar says
An another informative post on Picasa, nicely explained and written.
Sapana Behl says
I normally use picasa to fill light but most of the times I click in afternoons, so don't need the light filling.Very useful post Valli.
Pavani N says
Very useful post Valli. Picasa is such a user friendly software and edits the pictures beautifully.
Priya Suresh says
Many of us use picasa for lighting and editing, such an informative post Valli.. Truly helpful for many..
Harini-Jaya R says
I also use this tool to fill in light, Valli. Thanks for the post.
Suma Gandlur says
That is one useful post, Valli.
The Pumpkin Farm says
i thrive on this feature of picassa...well documented post again