

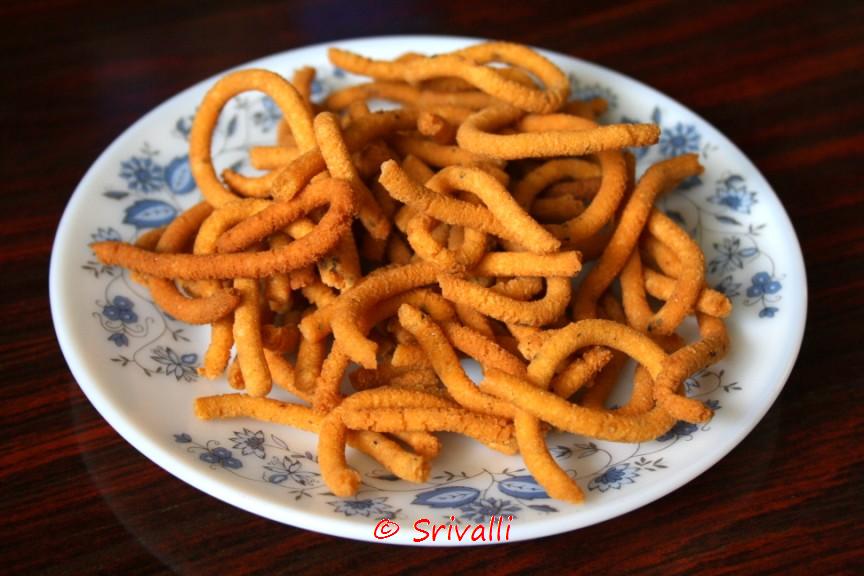
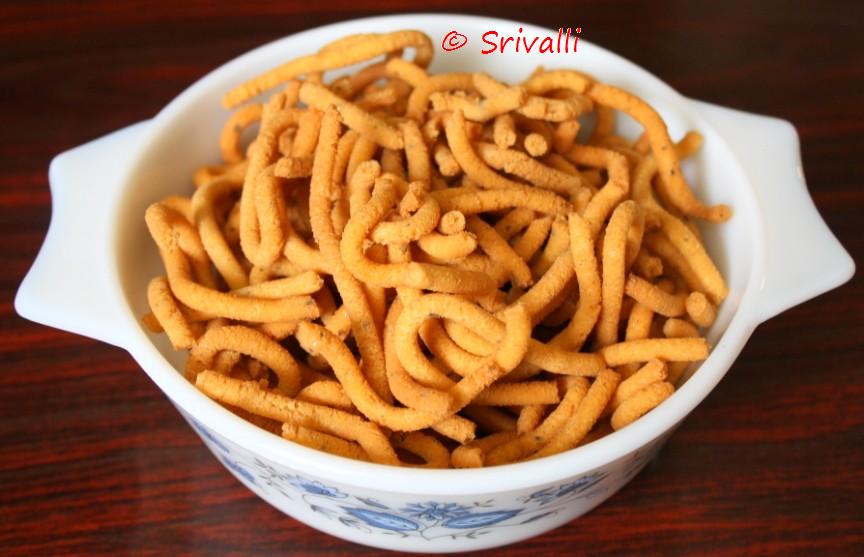
We also didn't have the Kara Sev ladle, so made it with the regular press that had a wider hole. The result was very tasty one but I felt it wasn't as soft as what we get at shops. The difference between Murukus and Kara Sev is that the latter is not as crispy as the former.
Kara Sev - Indian Cooking Challenge for June
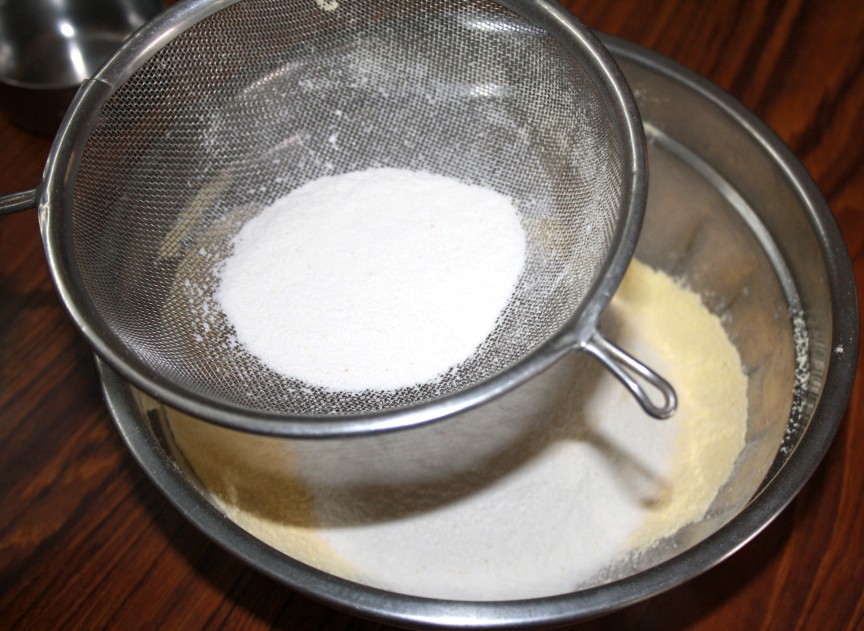
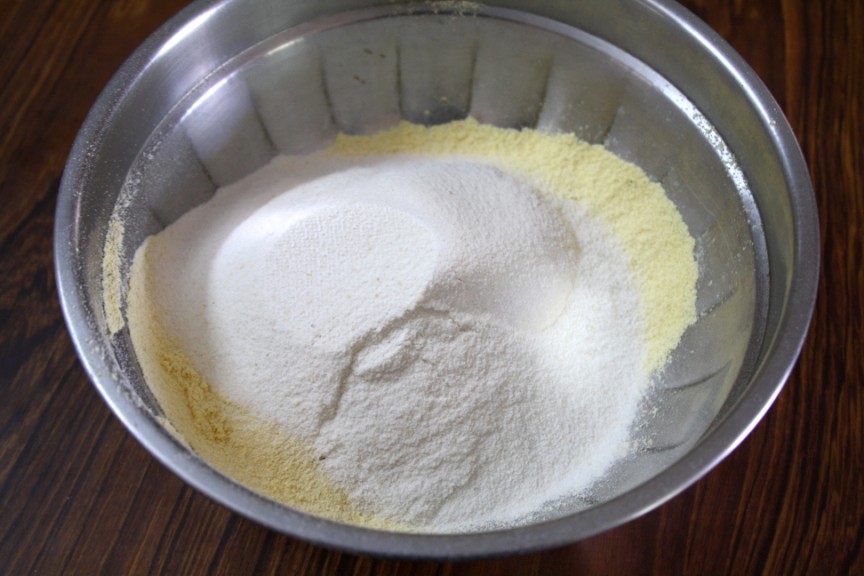
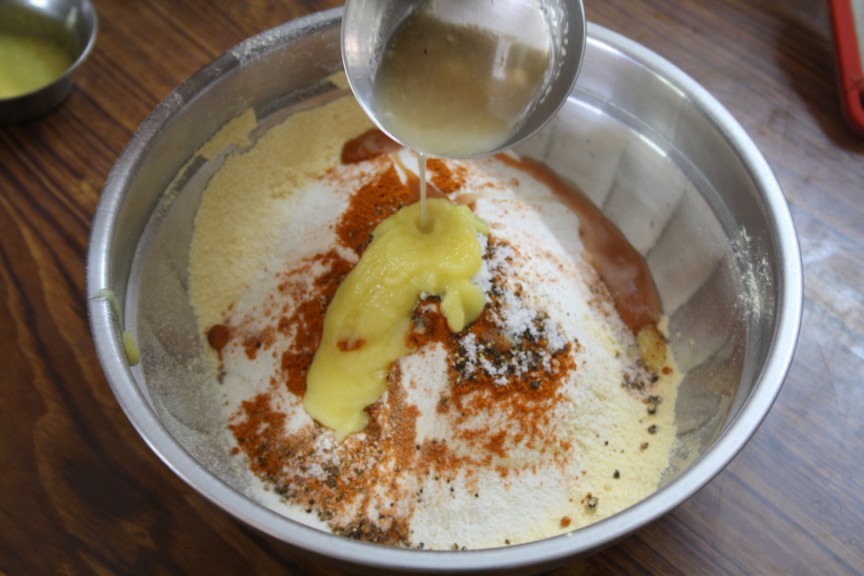
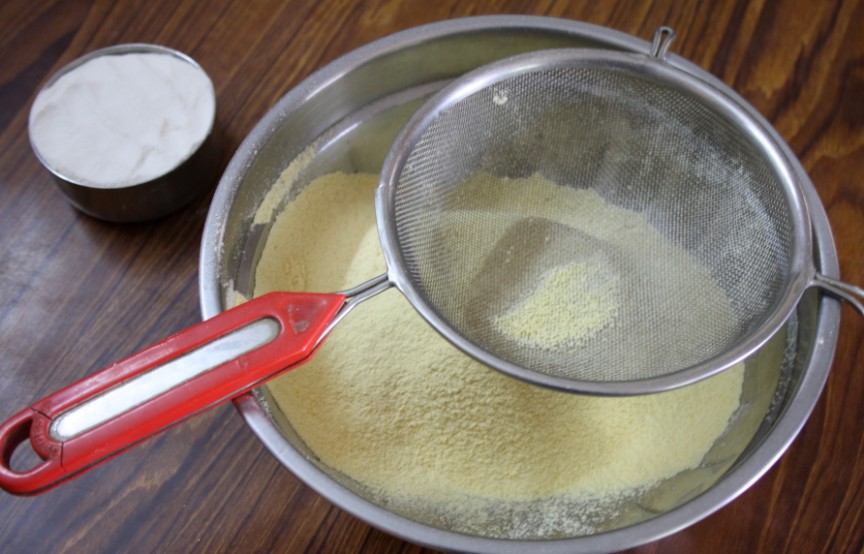
In a bowl, sieve the flours together.

one after the other.

Add one by one to the bowl with flour.

Ghee goes next.
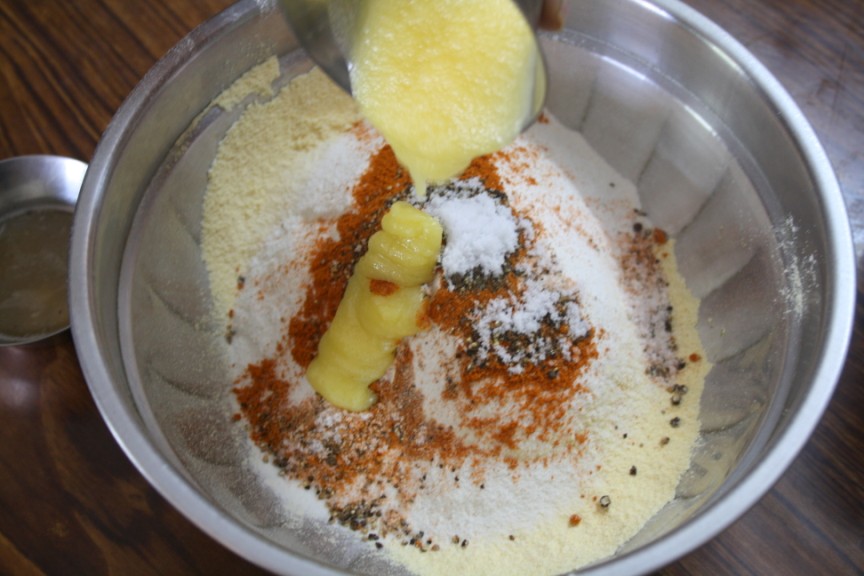
Followed by garlic water.
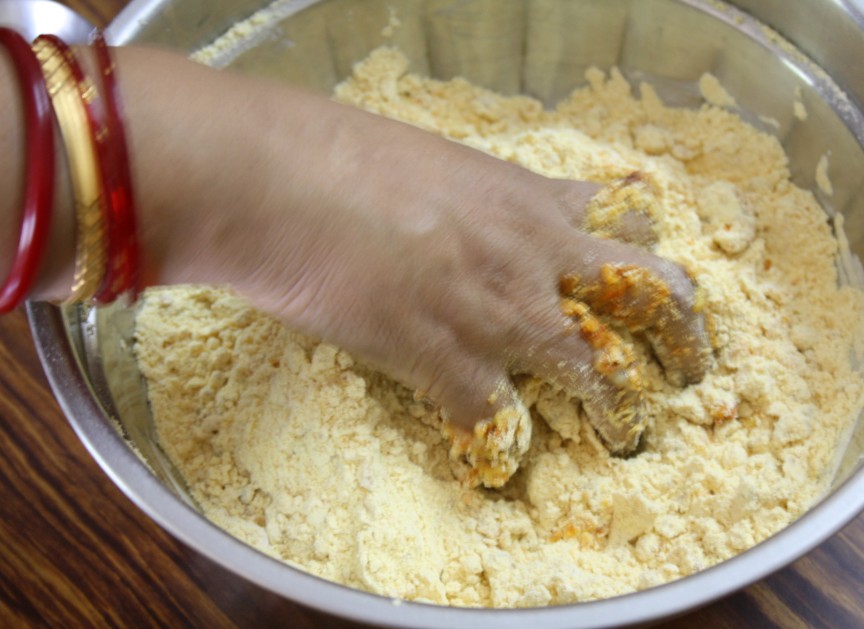
You should get a crumble like this.

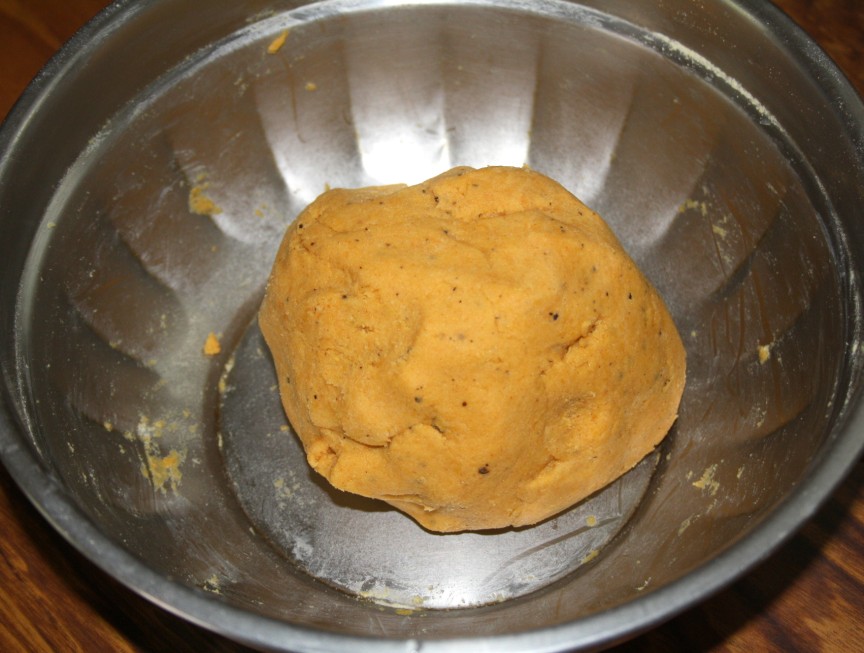
Finally gather together like this.
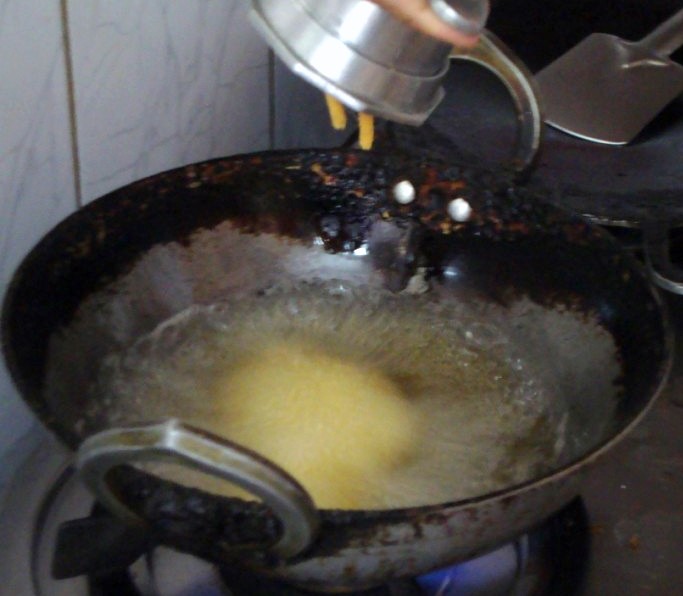
After this it is same as regular muruku. I will post on detail with the actual sev ladle and post pictures on that.
Kara Sev Recipe 1Ingredients needed:
Gram Flour (Besan)- 2 1/2 cups
Rice flour - 1 cup
Chilli powder - 1/4 tsp
Black pepper coarsely powdered - 1 tsp
Ghee - 2 1/2 tsp
Cooking soda pinch (optional)
Salt to taste.
Crushed garlic (optional) 2 pods
Oil to deep fry.Method:
- Sieve both Gram flour and Rice flour together in a bowl and make a pit.
- Add chilli powder, Pepper powder, Salt, Crushed garlic, Ghee, Cooking soda.
- Mix thoroughly with hands. It should look like bread crumbs. Divide the dough into 4 portions.
- Take One portion of this mixture, sprinkle water, knead like Puri dough.
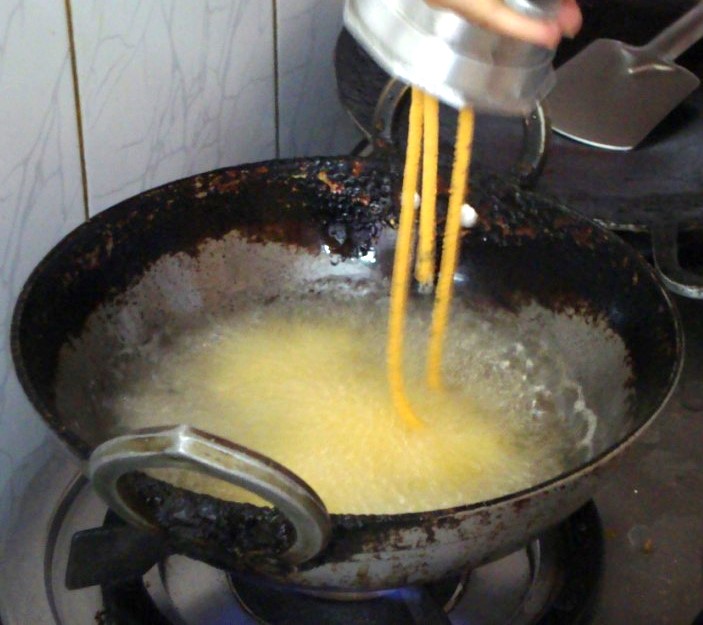
- Heat oil in a kadai, Use a ladle with lot of holes (Kara Sevai ladle) or Sev maker. Put some dough on that and rub directly into oil.
- It will be like split string. Deep fry in oil , drain excess oil.
- After cooling this off, Store this in an airtight container.
Kara Sev Recipe 2
Besan - 2 ½ cups
Rice flour - 1 cup
Ghee - 1 tbsp
Soda - 2 pinches
Salt
Oil - to deep fryGrind fine with water:
Red chillies - 6
Pepper - 1 tsp
Garlic - 7, 8 flakes ( optional)Method to prepare:
- Sieve both flours together.
- In a big plate cream ghee & soda very well till the paste looks white.
- To this add flours & salt.
- Strain the chilli paste & add, mixing everything well.
- Add enough water to get a soft yet stiff dough.
- Heat oil & keep the 'karasev jalli karandi" ( a special holed ladle used for this) above the oil.
- Rub the dough on it so that long strands will fall into the oil.
- Fry well & remove to a kitchen tissue.
- Wash the " jalli karandi" ( ladle) with water every time after use, so that the rubbing will be easy.
Notes to read:
- By dividing the dough into smaller portions before pressing down, will keep the dough fresh and also it consumes less oil while frying.
- The dough has to be really stiff, if it little runny, add more desan to get the right consistency.
- If you are using the kara sev ladle, rub it down directly on the oil.
If you are not comfortable pressing directly in the oil, you may press on a slightly oiled sheet or plate and transfer the bits into the oil.
If you do not own a murukku press, try to roll thin cylindrical shapes using fingers, just about 2" long and deep fry.- Please ensure you are very careful while pressing down on the oil, it will be very hot, this is really not safe to have kids around.
- This normally stays crispy for a month when stored in an air tight container.
To all my ICC members, please link your Kara Sev post to Mr. Linky.

veena krishnakumar says
Hi srivalli
thank you for the recipe. came out perfectly well. i have linked up my url. thanks again
Sailaja Damodaran says
Very crispy.........
Sharmilee! :) says
Crispy Sevs perfect for tea time.....
PJ says
Looks crispy and yum..
N S says
Sev looks so tasty. I missed this time challenge. Looking forward for the next one.
Vegetarian Yogini says
Must admit was reluctant to try it....but it came so so good! I do not think I have any left so I must make more. Thanks, Srivalli!
Vegetarian Yogini says
Dear Srivalli, my name appears twice since I have first linked Vegetarian Yogini to your own site! Please remove my name in the list, which is no 4. Sorry.
Scraps says
Had fun with this challenge, looking forward to the next one!
Kairali sisters says
The step by step pictures are so helpful srivalli, Sev looks yumm yumm..
Love
Kairali sisters
Niloufer Riyaz says
the kara sev was extremely delicious.
Madhavi says
Hi Srivalli,
Thanks for the recipe.Nice snack it turned out very delicious.I just posted the recipe.
Suma Gandlur says
Srivalli, we tried with the chakli mould and prepared fine sev adding more chili powder. They came out good. Thx.
Waiting for the next theme. 🙂
Divya Vikram says
Posted my link Valli. Was great taking part in this challenge.
Nutan says
Turned out tasty and crispy. Thanks for the recipe. Have linked my post.
Nutan says
Oops I posted the wrong link. Could you delete the first one. I have linked properly to the second one. Thanks.
myspicykitchen says
Turned out good. The first day it wasn't very spicy but strangely, from the second day onwards the spice level was just perfect!
Vegetarian Yogini says
Very nice show! Loved browsing through everyone's kara sev post! one thing though: I know most bloggers like to keep it simple and show just the outcome of the recipe, not the process of cooking, but for this particular challenge, it would be great if we could see more shots of the labor! After all it is the journey that counts! 🙂
Malini says
Srivalli, linked up my url...thanks for the recipe...
Ambika says
Hey Valli, posted my link just now..sorry for the delay 🙁