

Since the time hubby dear changed his pattern of lunch and breakfast, I really have a serious problem of finding a chutney will that stay good till afternoon. I have already said chutney at home is always groundnut chutney. But if you don't make the chutney properly, there is a serious problem it getting spoilt.
Earlier when we use to make chutney in those hand stones, the chutneys that are made with raw ingredients, stay good even till evening. However, using the mixers or blenders makes the chutney spoil due to overheating from the motors. It meant I have to make a chutney that stays good, yet something that is not repeated every day. I decided on tomato chutney and using various combinations with it. I send mostly tomato or onion based chutneys, sometimes alter with coriander/ mint chutneys.
I had this chutney for garlic paste that's used as an add on for Masala Dosa. I had to make it, so decided to make dosas for dinner. We always have standard menus at home, which makes life really easy for me to plan well. So Saturday breakfast is always Ven Pongal / Kara Pongal.
In which case, we will have excess dosa batter that needs to be used up, as Sundays are always either Pooris / Appams. So I alter with either Dosa / Ragi Mudda for Friday night dinner. Having decided on Dosa for the night, I thought I had the perfect chance to try this garlic spread. I love garlic and so naturally this spread was very much liked.
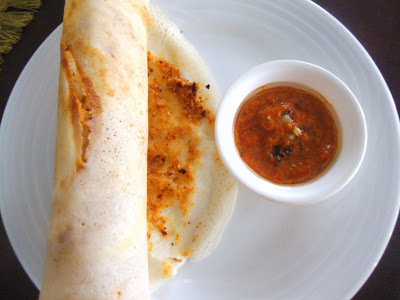
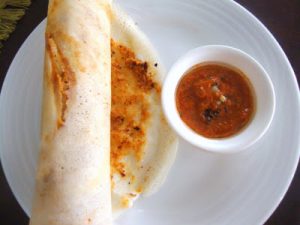
I made Red Bell Pepper Tomato Chutney for the side. It was delicious, to say the least!
Step By Step Picture Recipe to make Garlic Chutney Spread


Before I get to the recipe, here's an easy way to quickly peel garlic from its skin, soak the garlic in water for a while and press it down on its head. It will easily shed its coat.


Ingredients
2 whole pods Garlic (I used all the garlic as shown in the picture)
2 tsp Urad Dal
4 Red Chilies
1 tsp Coooking Oil
Salt to taste
Instructions
Soak the garlic in water for 5 mins, peel the skin.
Heat a nonstick pan with 1 tsp of cooking oil. Chop the garlic and sauté in hot oil. Simmer for 5 - 7 mins, while you keep stirring in intervals. Roast till the garlic turns soft or brown. Remove to a plate.
Add urad dal to the pan, no need to add oil. Sauté well. When the urad dal starts browning, you can remove it to the same plate.
Then, add dry red chilies. Quickly saute in the hot pan, if you notice there is no need to add cooking oil for this also. Once it's browned on all sides, remove and allow it to cool.
Once all the ingredients reach room temperature, take them in a blender and add salt and blend to a smooth paste. If the mixer you use is not small enough to blend this to a smooth paste, you can add little cooking oil to aid it.
Notes
If you are planning to preserve the spread for a day or so, it's advised not to add water. Else, if you are planning to finish off the entire batch in one go, you may add some water to getting the smooth paste.
Once this is ready, proceed with spreading the dosa. When the dosa is cooked on both sides, spread 1 tsp of this spread on top and roll the dosa over to serve hot!
As optional you can add tamarind if you prefer.

Other Dosas in 101 Dosa Varieties
101 Dosa Varieties on Cooking 4 all Seasons
Recipe
Garlic Chutney spread for Masala Dosa ~ 101 Dosa Varieties | How to make Garlic spread ~ Step By Step Recipe
Ingredients
- 2 whole pods Garlic (I used all the garlic as shown in the picture)
- 2 tsp Urad Dal
- 4 Red Chillies
- 1 tsp Coooking Oil
- Salt to taste
Instructions
How to make Garlic Spread or Garlic Chutney
- Soak the garlic in water for 5 mins, peel the skin.
- Heat a nonstick pan with 1 tsp of cooking oil. Chop the garlic and sauté in hot oil. Simmer for 5 - 7 mins, while you keep stirring in intervals. Roast till the garlic turns soft or brown. Remove to a plate.
- Add urad dal to the pan, no need to add oil. Sauté well. When the urad dal starts browning, you can remove it to the same plate.
- Then, add dry red chilies. Quickly saute in the hot pan, if you notice there is no need to add cooking oil for this also. Once it's browned on all sides, remove and allow it to cool.
- Once all the ingredients reach room temperature, take them in a blender and add salt and blend to a smooth paste. If the mixer you use is not small enough to blend this to a smooth paste, you can add little cooking oil to aid it.
Vardhini says
I love garlic chutney .. will be posting it soon. I just grind garlic and chillies. This version looks interesting.
Hari Chandana says
Wowwwwww.... chala bagundi.. chustuntene norooruthondi. .Yummy 🙂
Pavani says
ooohh.. those dosas look soooo good Valli.. crispy and yummm.. Garlic chutney looks awesome. My husband would love it. I'm making this soon.
Gayathri NG says
Its first time here. Luv the chutney and will try it soon..perfect for dosa spread..
Gayathri NG says
Its first time here. Luv the chutney and perfect for dosa spread..
Harini says
very tempting! I am sure my husband would love this too..though I can't take too much of garlic 🙂
Nirmala's kitchen says
Looks nice and spicy.Although I dont use garlic.
The Pumpkin Farm says
very well made dosa, garlic is always welcoming idea. lovely recipe
Priya says
Wat a flavourful spicy chutney,love it..
vaishali sabnani says
like the addition of daal to the chutney...next time willmake this one instead of the traditional garlic chutney.
Rajani says
Love dosas with chutney spread on them, they taste wonderful.
Yours look really good!
jayasree says
Mouthwatering chutney....
Usha says
mouthwatering! will try it sometime
Kalyani says
yummy ! i too make it this way ! may be a little more tamarind too !
sliceofmylyfe says
So many chutneys. Wow. I have been bookmarking post after post.
mailnase says
Nice