

Though creating Text links is a general concept in a website, I will be talking more in terms of a food blog.
How to create Hyperlink or Text Links in your post
Knowing basic HTML codes is very essential when you are maintaining a blog. Especially if you are a food blogger and you want to participate in the many different food blog events that happen every month.
There are two ways we can create links.
Text Links
Image Links
In Text Links, you simply highlight a text and click on the Link button available on your editor. Give the details and save the setting.
Images Links are little more complicated wherein you will have to go to the HTML part of your editor and give the code.
In image links, the images used, will have to be hosted in a server. For hosting you can use Google Picasa, other third party hosting websites like Photobucket etc.
After hosting the image, you will have to give the Image location in the code that you will be placing.
Now let's first see how we can do Text Linking
How to create hyperlinks:
In your compose, type in the text you want to be a linkable text, in other words if we are talking about Food blog events, enter the event name, highlight the name.

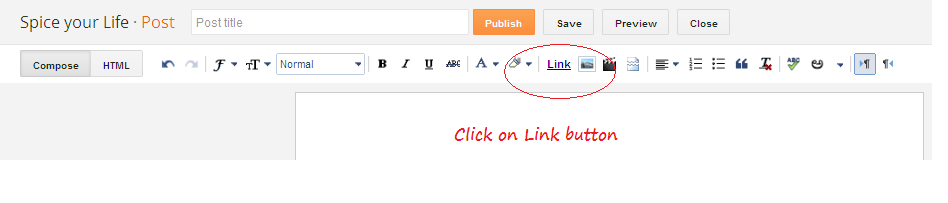
Click on the LINK button on your editor.
Another new window will open, which will have the text highlighted

Next give the URL of the link which you want to create.
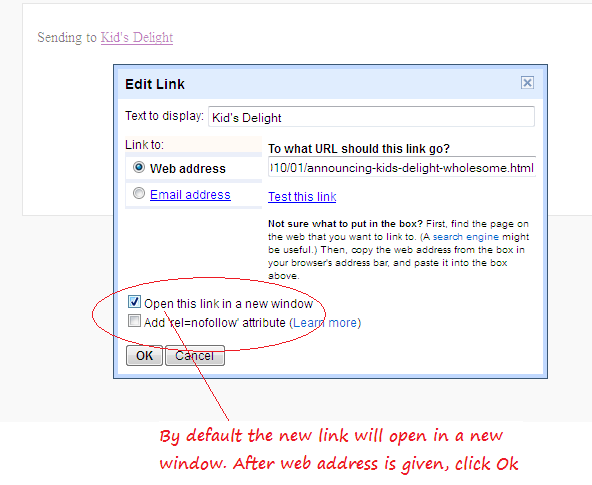
By default "Open the link in a new window" is enabled. Once done, click ok and save. It will look like the below
How to create Image Links:
Second method of linking to an external website in your post, is linking directly using the image. In sense Food blog events, all of them have a logo used for the event. You can directly use that image with a link in your post
You can go to the host website and get the Image details.

If you right click the image, you can get the Image location. Do "Copy Image Location"
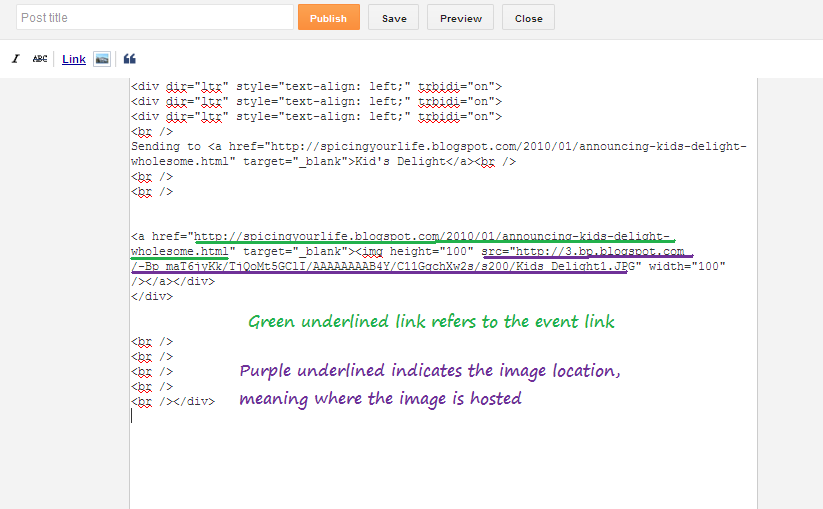
This is the code you will have to use
< a href = " URL Link ">
< img sr c = "Image Location "/ >< /a>
Replace the URL Link with the link ending with.html
Replace the Image Location with link ending with .jpg
Remove the spaces before using the code..
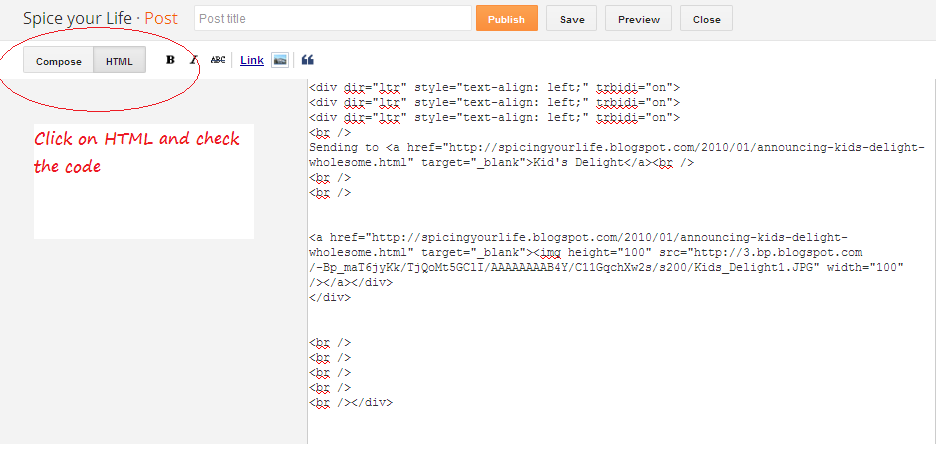
After giving the links, click on "Compose"
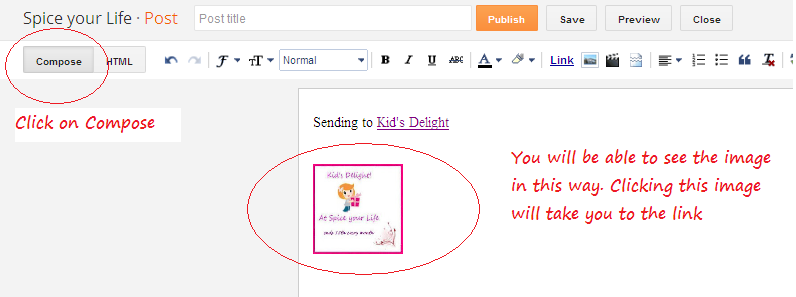
You will see the event logo as below. You can click on the image which will take you to the URL directly.

Amelia says
Hi, thank you for sharing this Very informative posting. Really appreciate your effort.
Have a nice day, regards.
vaishali sabnani says
Valli thanks..this takes me back when I had just started blogging..u came in to rescue...remember?..I had no clue how to hyperlink!..as yet I am unaware of lot of things..its because of u friends I am here today.THANKS A MILLION TON!
Priya says
Wonderful, i had hard time with this text link and image link issue, some of the few bloggers helped me in my earlier blogging..Definitely helpful for many new comers.
foodiliciousnan says
Forget newcomers, Priya. Even I did not know image linking...thanks Valli. I'm going to try it soon 🙂
Archana says
Thanks dear. This is most useful. Bookmaking this for when it comes to using this I will have forgotten where I read and what?
FORMAN ITE says
Thanks. It was really helpful.
My image link is opening in the same tab but I want to open it in a new tab. How can I do that ?